I first saw this done on The Great British Baking Show and then watched Paul Hollywood demonstrate it on the Master Class video. He described it as a challenge even for experienced bakers and something that would really test the competitors. After watching them try it and seeing the range of results I added this to my Baking Bucket List and moved it right to the top.
This is a tough design to get right. Soooo many things can go wrong (and did) while learning how to do this. But the beautiful result is worth the time and effort and practice needed to get it right.
There are 5 steps to braiding, or plaiting, the braid. The first one is a set-up step and the remaining 4 are repeated over and over to make the braid. The steps are below and you can watch the video below of me doing the braid to see them in action. Strands are counted from left to right and numbered 1 to 8. As you braid the number of the strand is whatever place it occupies at that time. So strand 8 when laid over strand 5 then becomes strand 5 for the next step.
- Strand 8 goes under 7, back up and over 1, this step is done only once
- Strand 8 goes over 5
- Strand 2 goes under 3, back up and over 8
- Strand 1 goes over 4
- Strand 7 goes under 6, back up and over 1
- Repeat steps 2-4
What I learned:
- You need a strong bread dough. I am including the recipe that worked the best and produced that beautiful work of art you see above. It’s a little non-traditional but works great and is pretty easy to do correctly without a lot of experience. My first 3 tries with dough were (literally) flops and didn’t rise up like they should have after all the manipulation of the braiding process.
- Use a double loaf sized batch (which is what this recipe is as it uses 2 packets of yeast) so you have plenty of dough to make nice fat strands that end up making a nice fat loaf. The extra from the ends makes a cute little baby loaf when you are done so nothing is wasted. Plus, the double batch gives you the luxury of pinching off the ugly parts on the ends and still leaves you with a big, beautiful loaf when done.
- Practice with string or parachute chord before you work with dough. Getting the rhythm of the plait takes several tries. While practicing with parachute chord I had to stop and restart a bunch of times because I got off and didn’t know what the next step was. You do not want to do that with bread dough. Trust me.
- When rolling out the strands, make them as even in width as possible and don’t worry too much about the length because you are going to remove the ends anyway.
- Don’t let the dough strands stick together! Use a little flour on each strand starting about 1 inch from the top going all the way down each one to keep them from sticking to each other as you plait. Once you have strands that stick to each other your braid will have puckers where you had to detach them that mar the finish. Don’t use too much flour when braiding or the braid will not be smooth and integrated inside when you cut it.
- Dont let it over-rise during the second proofing and don’t over-knead it before rolling out your strands. All the handling it gets during the braiding process seems to make it susceptible to collapse before going into the oven when you put the egg wash on.
It was a ton of fun to do, and here is the journey in pictures and video.


Keep it tight at the top 
Don’t lose your place 
Don’t stretch the strands 
Pinch off the ends and tuck under 
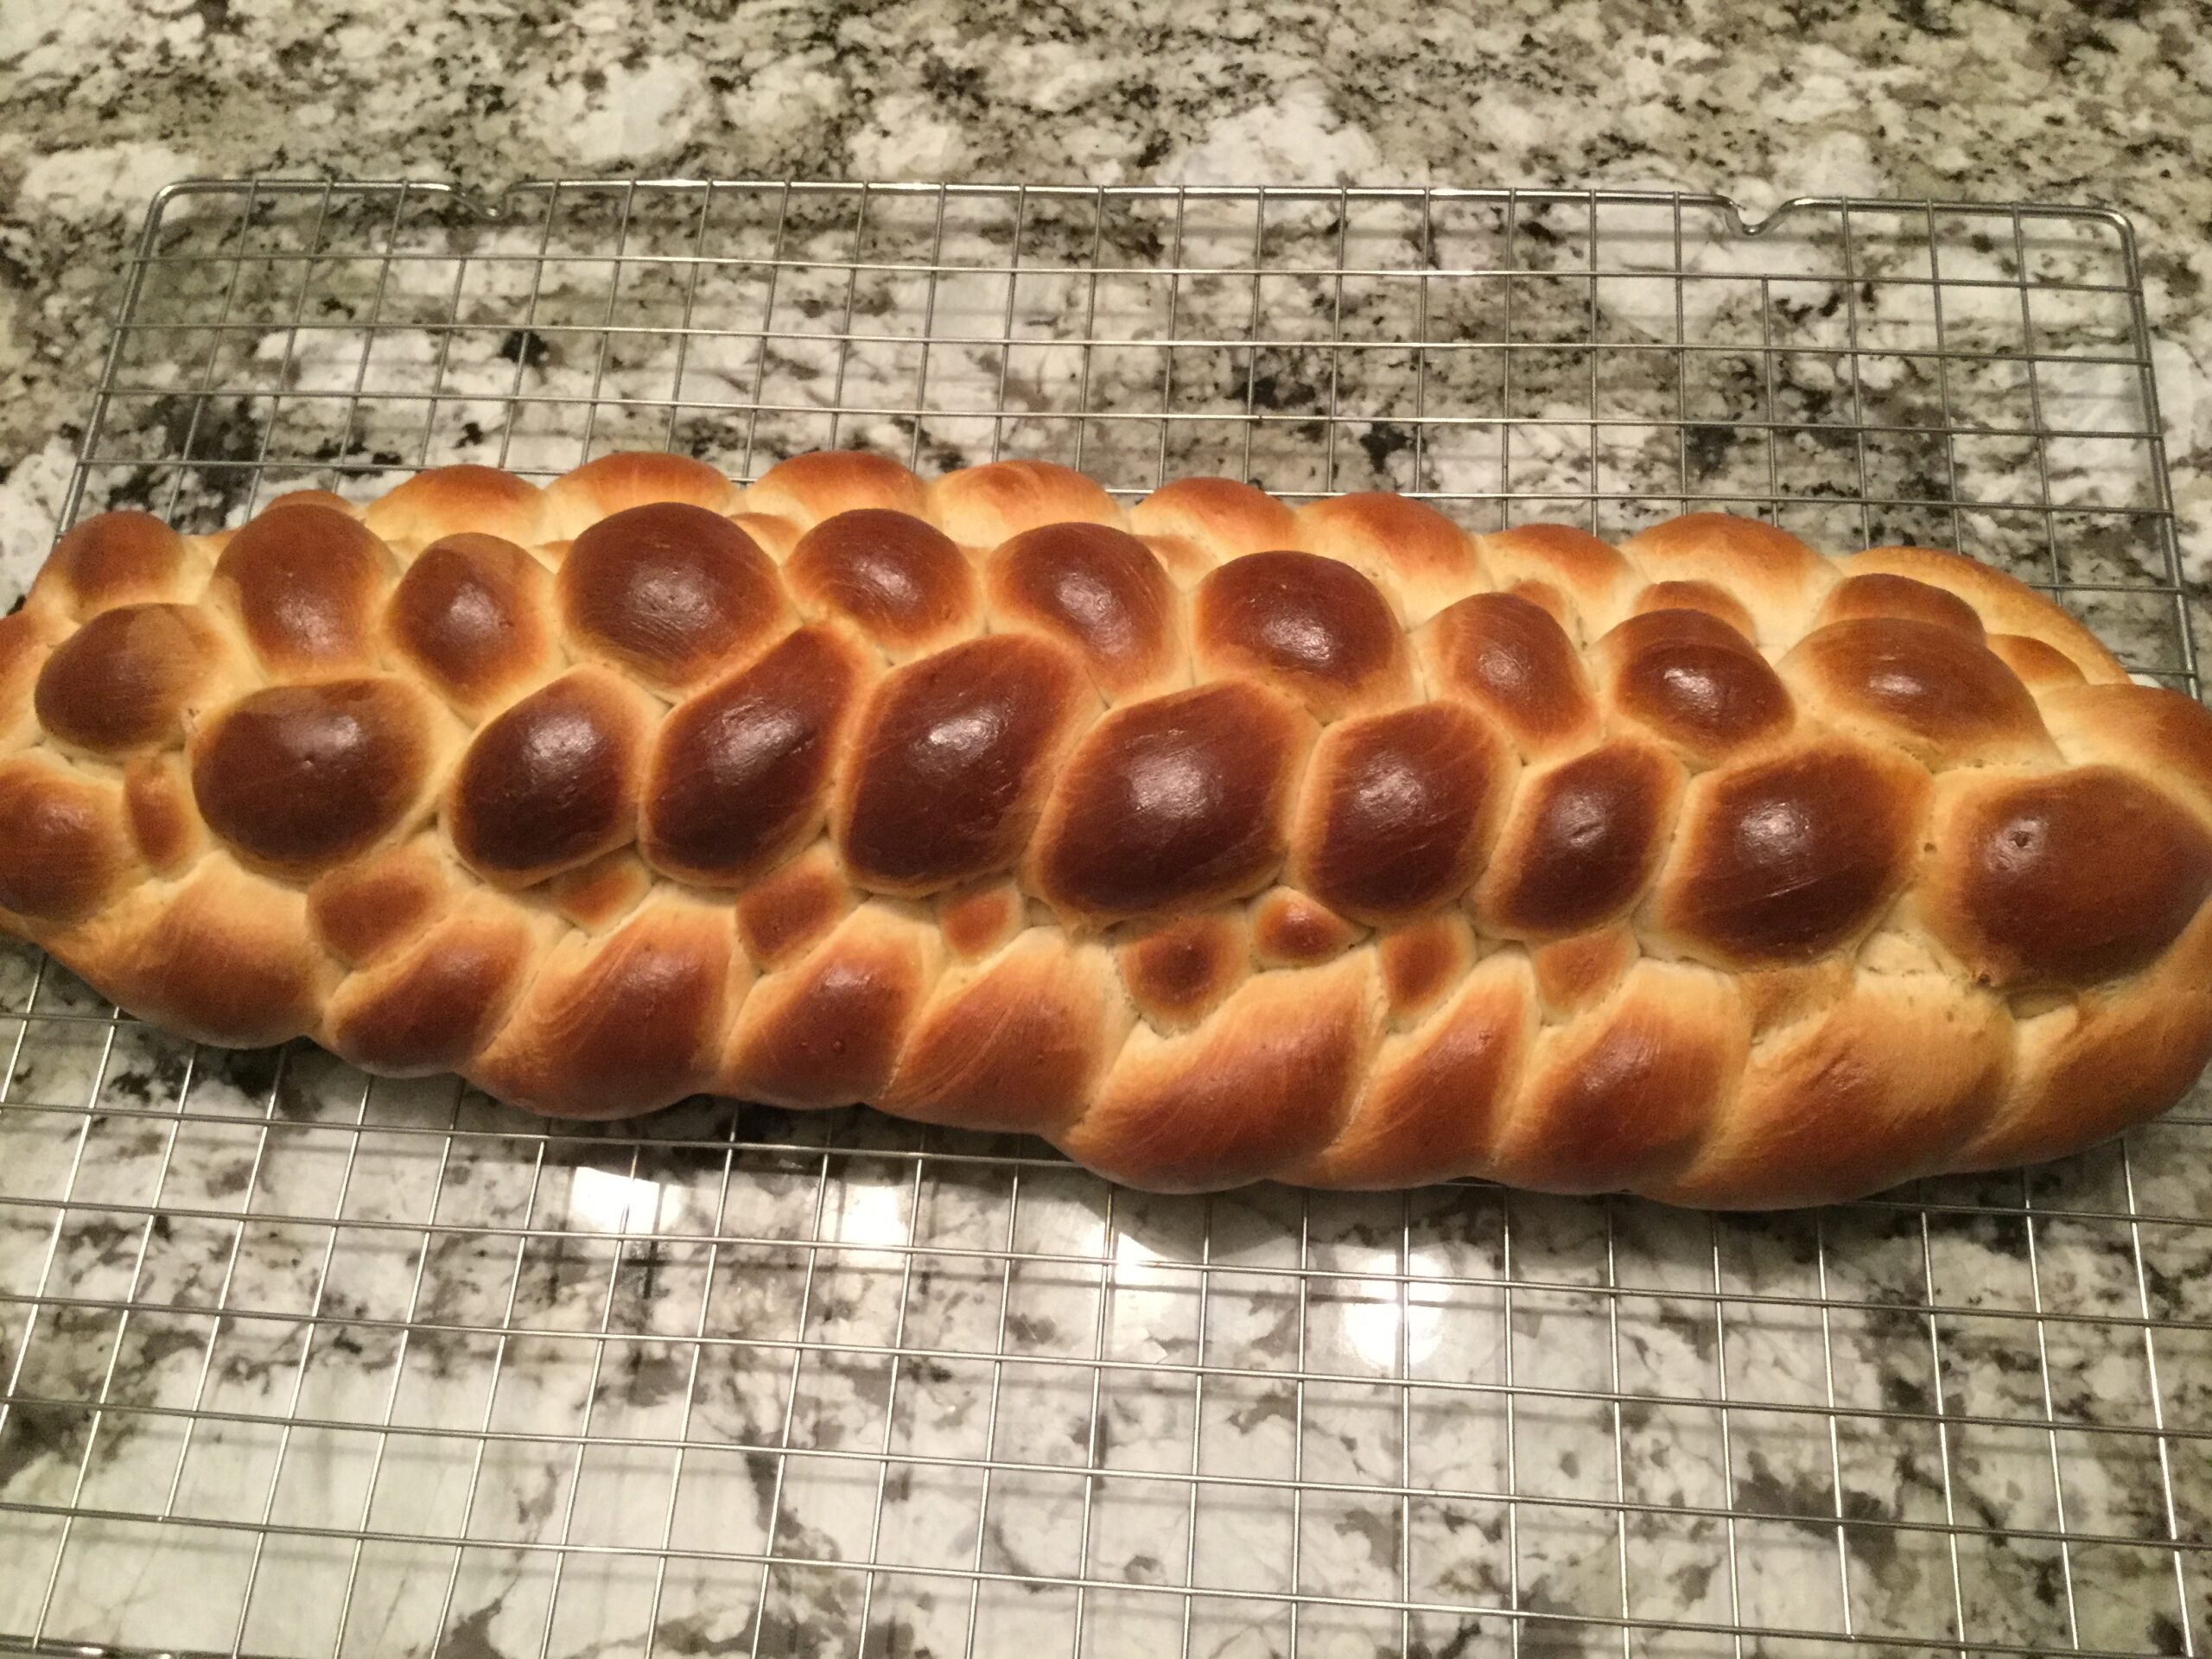
Egg wash gives it the mahogany glow 
Plaits show on the bottom, too 
One thought on “8 Plait Bread Braid”
Comments are closed.